


How to Unhide All Rows in Microsoft Excel
Have you ever found yourself staring at a spreadsheet where some data seems to be missing? You're not alone. Hidden rows in Excel can be a common issue, especially if you're working with large datasets or collaborating with others. Hidden rows can obscure important data, disrupt workflows, and lead to missed insights. Today, we're going to address this problem head-on and show you how to unhide all rows in Excel, ensuring that your data remains accessible and visible at all times.
Hidden rows are typically used to temporarily hide data for presentation purposes, but they can also become a nuisance when you need to access that data later. This guide is designed to help users with various levels of Excel proficiency. Whether you're a beginner or an intermediate user, you'll find the steps easy to follow and very useful in your data management tasks.
In this article, we’ll cover everything from understanding why unhiding rows is important to the step-by-step process of unhiding all rows in your Excel spreadsheet. We’ll also dive into some advanced techniques that will help you maintain the visibility of specific rows and ensure that all sheets in your workbook are accessible. By the end of this guide, you’ll be able to manage hidden rows with ease, ensuring that your data is always visible and ready for analysis.
Importance of Unhiding Rows
Unhiding rows in Excel is more than just a simple task—it's an essential part of data management and analysis. When rows are hidden, they can contain important information that impacts calculations, charts, and pivot tables. For instance, if you're working on a financial spreadsheet and a row with critical data is hidden, your calculations might return incorrect results. This can lead to misinformed decisions and data discrepancies. Therefore, ensuring all rows are visible is crucial for accurate data analysis and reporting.
Moreover, hidden rows can also affect the usability of your spreadsheet. When data is hidden, it can be challenging to understand the context of the data that is visible. For example, if you’re preparing a report and certain rows with detailed explanations or notes are hidden, the report might not be as comprehensive as it should be. Unhiding rows helps in maintaining the integrity and completeness of your data, ensuring that all necessary information is visible and accessible.
Steps to Unhide All Rows

Unhiding all rows in Excel is a straightforward process that can be completed in a few simple steps. Here’s how you can unhide all rows in your Excel spreadsheet:
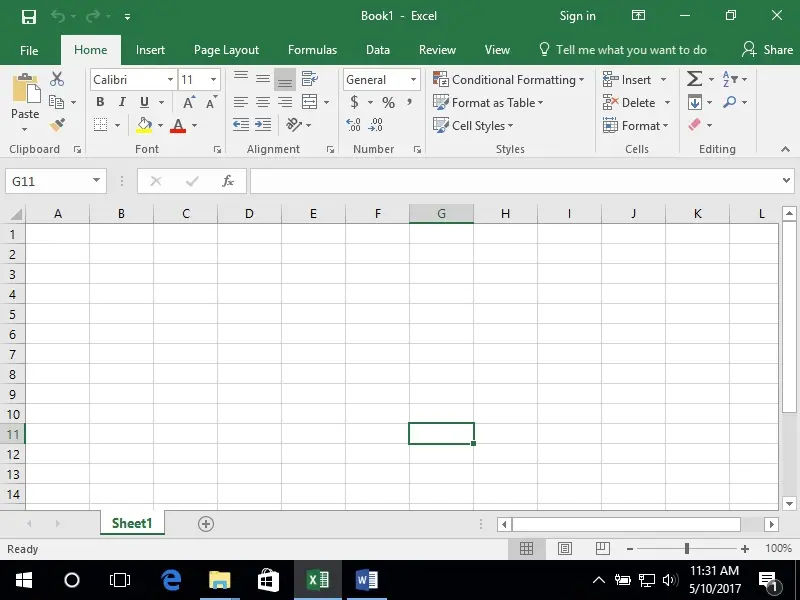
- Select All: Begin by clicking the select-all triangle located at the upper-left corner of the spreadsheet. This will select all cells in the worksheet, ensuring that all rows are included in the next steps.
- Right-Click: After selecting all cells, right-click on any row header. Row headers are the numbers on the left side of the Excel sheet that indicate row numbers.
- Choose Unhide: In the right-click menu, you will find an option labeled "Unhide." Click on this option to reveal all hidden rows.
- Review Data: Finally, take a moment to review your spreadsheet and ensure that all relevant data is now visible. This step is crucial to confirm that your data is completely accessible and ready for further analysis.
By following these simple steps, you can easily unhide all rows in your Excel spreadsheet. This process is particularly useful when you've inherited a spreadsheet with hidden rows or when you need to ensure that no data is inadvertently hidden.
Unhiding Specific Rows
Sometimes, you might not need to unhide all rows but rather specific ones. Here’s how you can achieve this:
- Identify Hidden Rows: First, identify which rows are hidden. You can do this by looking for gaps in row numbers or by using the "Find & Select" feature under the Home tab.
- Select Surrounding Rows: Once you’ve located the hidden rows, select the rows above and below the hidden rows. If you want to unhide a specific row, select the row numbers on either side of the hidden rows while holding down the Shift key to highlight the range.
- Right-Click to Unhide: Right-click on the selection, and from the context menu, choose "Unhide" to bring back the selected rows.
- Using the Home Tab: Alternatively, you can unhide rows from the Home tab. Click on the "Format" button in the Cells group, then select "Hide & Unhide," and finally choose "Unhide Rows."
These methods allow you to target specific rows that need to be made visible, ensuring that your spreadsheet remains organized and only the necessary data is revealed.
Unhiding Top Rows
If you need to unhide rows at the top of your spreadsheet, the process is slightly different. Here’s how you can do it:
- Go to Home Tab: Navigate to the Home tab in the ribbon at the top of the Excel window.
- Open Format: In the Cells group, click on Format to open a dropdown menu.
Select Unhide Rows: After clicking on "Format," you will see a dropdown menu. From this menu, select "Hide & Unhide," and then click on "Unhide Rows." This action will reveal any hidden rows at the top of your spreadsheet, allowing you to access all the data you need.
Check for Hidden Rows: After unhiding, it’s a good practice to scroll through your spreadsheet to ensure that all necessary rows are visible. This will help you confirm that no important data is still hidden.
Making Rows Visible All the Time
If you frequently need to refer to specific rows while working in your spreadsheet, you might want to keep them visible at all times. This can be particularly useful for headers or key data points. Here’s how to do it:
- Go to View Tab: Click on the "View" tab located in the ribbon at the top of the Excel window.
- Freeze Panes: In the "Window" group, click on "Freeze Panes." You will see several options, including "Freeze Top Row" and "Freeze First Column." Select "Freeze Top Row" to keep the top row visible as you scroll down through your data.
By freezing rows, you ensure that important information remains in view, making it easier to analyze your data without losing context.
Unhiding All Sheets
In addition to unhiding rows, you may also encounter hidden sheets within your Excel workbook. Here’s how to unhide all sheets:
Manually Unhiding Sheets
- Right-Click on Sheet Tab: Locate any visible sheet tab at the bottom of your Excel window. Right-click on it.
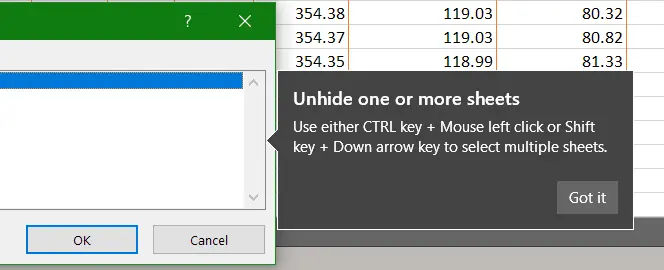
- Select Unhide: From the context menu, select "Unhide." A dialog box will appear, showing all hidden sheets.
- Choose a Sheet to Unhide: Select the sheet you want to unhide and click "OK." Repeat this process for any other hidden sheets.
Using VBA to Unhide All Sheets
If you have multiple hidden sheets and want to unhide them all at once, using a VBA macro can save you time:
- Open the VBA Editor: Press
Alt + F11to open the Visual Basic for Applications (VBA) editor. - Insert a New Module: In the VBA editor, right-click on any of the items in the Project Explorer, go to "Insert," and select "Module."
- Paste the Macro: Copy and paste the following code into the module window:
vba
   Sub UnhideAllSheets()
       Dim ws As Worksheet
       For Each ws In ThisWorkbook.Worksheets
           ws.Visible = xlSheetVisible
       Next ws
   End Sub
- Run the Macro: Close the VBA editor and return to Excel. Press
Alt + F8, select "UnhideAllSheets," and click "Run." This will unhide all sheets in your workbook.
FAQs
What if Unhiding Rows Doesn't Work?: If you find that unhiding rows doesn’t seem to work, check if the row height is set to zero or if there are any active filters that might be hiding data.
Can Hidden Rows Contain Formulas?: Yes, hidden rows can contain formulas that affect calculations in your spreadsheet. It’s important to unhide them to ensure all calculations are accurate.
Is There a Shortcut to Unhide Rows?: While there isn’t a direct keyboard shortcut to unhide rows, you can quickly select rows and use the right-click method to unhide them.
How Can I Prevent Rows from Being Hidden Again?: To prevent rows from being hidden in the future, be cautious when collaborating with others and ensure that you communicate about any changes made to the spreadsheet.
By mastering these techniques, you can enhance your Excel skills and ensure that your data is always at your fingertips.
Conclusion
Unhiding rows and sheets in Excel is a vital skill for anyone who works with data. By following the steps outlined in this guide, you can easily manage hidden rows and ensure that all your data is visible and accessible. Whether you need to unhide all rows, specific rows, or entire sheets, the methods provided will help you maintain the integrity of your spreadsheets and enhance your data analysis capabilities.
Remember, keeping your data visible not only improves your workflow but also ensures that you make informed decisions based on complete information. With these techniques at your disposal, you can navigate your Excel spreadsheets with confidence and efficiency.